A Quick and Easy How-To for Making Your Own Videos

You can film great videos using just a smartphone, some inexpensive equipment, and a proper setup. Here’s how.
|
Top Takeaways
|
Overview
So you want to make a video? That’s great! It’s a challenging, but fun project that’ll help you connect with people and share your ideas. Whether presenting some history or info, showing folks how to complete a task, interviewing someone, or any combination of these, this comprehensive post will help by introducing the basics—from developing your initial idea, to sharing the secrets of good videos, to putting the finishing touches on your final video, and sharing it far and wide.
To begin, let’s talk about the three phases to most video projects:
- Pre-Production: Planning
- Production: Filming
- Post-Production: Editing
In Pre-Production, you’ll plan your video project so that the next two stages—Production and Post- Production—run as smoothly as possible. This includes developing your idea, outlining the segments, gathering materials and equipment, setting the schedule, and so on. Like much of the creative work you’ve done before, you know that a detailed project plan is key. To document what you are creating and why, it may be helpful to complete this Creative Brief.
In Production, you’ll gather or create the component parts of your video—whether filmed segments, still images, or something else. The filmed portions may include on-camera demonstrations or interviews (“a-roll”) as well as supplemental footage used to add depth and context (“b-roll”). It’s important to note that your video needn’t be a single take—you can stop and start, film out of sequence, and have some moments that aren’t perfect (saying “umm”, going off on a tangent, having a shaky camera at times, etc). These can all be edited out in Post-Production.
Also, though in the past lots of expensive equipment was needed for Production, today you can film high-quality videos using just your smartphone, some inexpensive equipment you can buy online, and a good setup. More on this below.
In Post-Production, your work will get the finishing touches. This will include rough and final cuts, which may consist of audio tweaks, adding still images or graphics, overlaying a- and b-roll, and so on. This is often done by an experienced videographer, but nowadays there are a number of reat software options for the DIY-er.
Once all that work is done, your video is ready to be shared. You can upload to YouTube, embed on websites, and share via your social media channels so everyone can view the great video you created.
Production: Equipment & Setup
General
- Have all of the items you need on hand, including equipment, materials, and so on. Nothing kills the vibe than having to stop halfway through and search for a particular item.
- What to wear? Anything that places you in contrast with your background is great. Tight patterns can sometimes get tricky, so try to avoid those. You can diminish any “shininess” to your face by using blotting paper and/or by doing a light dusting over the shiny areas with some powder.
- Any space will do so long as it works for what you’re presenting, but be sure to clear up any particularly distracting items so the viewer focuses on you primarily.
- Check your positioning in front of the camera to make sure you’re centered and in focus. Head and shoulders is all you need, though it may make sense to have more of your body in the shot at times—if you’re demonstrating with a large machine, etc. (Hint: being off center is ok sometimes too, especially if there’s something you want to show or demonstrate.)
- Place tape on the ground to note the extent of your camera’s field of view, left to right, and the centerpoint. This will help you “hit your mark” so you don’t walk off-camera.
Lighting
- The best lighting is even and bright: without shadows or bright spots, not backlit, and so on. Think of great product shots on white backgrounds and you’ve got the right idea.
- You can use supplemental lighting if your setting doesn’t have enough light. This is by far the best equipment list and setup we’ve seen: Down and Dirty Lighting Kit
- If using a professional editing tool or experienced videographer: After the lights are set-up, record a clip of the speaker, in place, holding a piece of white paper. This helps with color correction in editing.
Audio
- In addition to your phone/camera’s microphone, you might consider a second one to pick up speech in a more clean way. This needn’t be a dedicated “real” boom or stand mic. It could simply be another smartphone (using the voice memo option to record sound), or iPhone earbuds also work well. You can even make your own lavalier mic using old earbuds, if wanted.
- If using a professional editing tool or experienced videographer: Record ‘room tone’ for 10-20 seconds. Just let the camera roll when you’re done, and don’t talk. This allows for better sound editing.
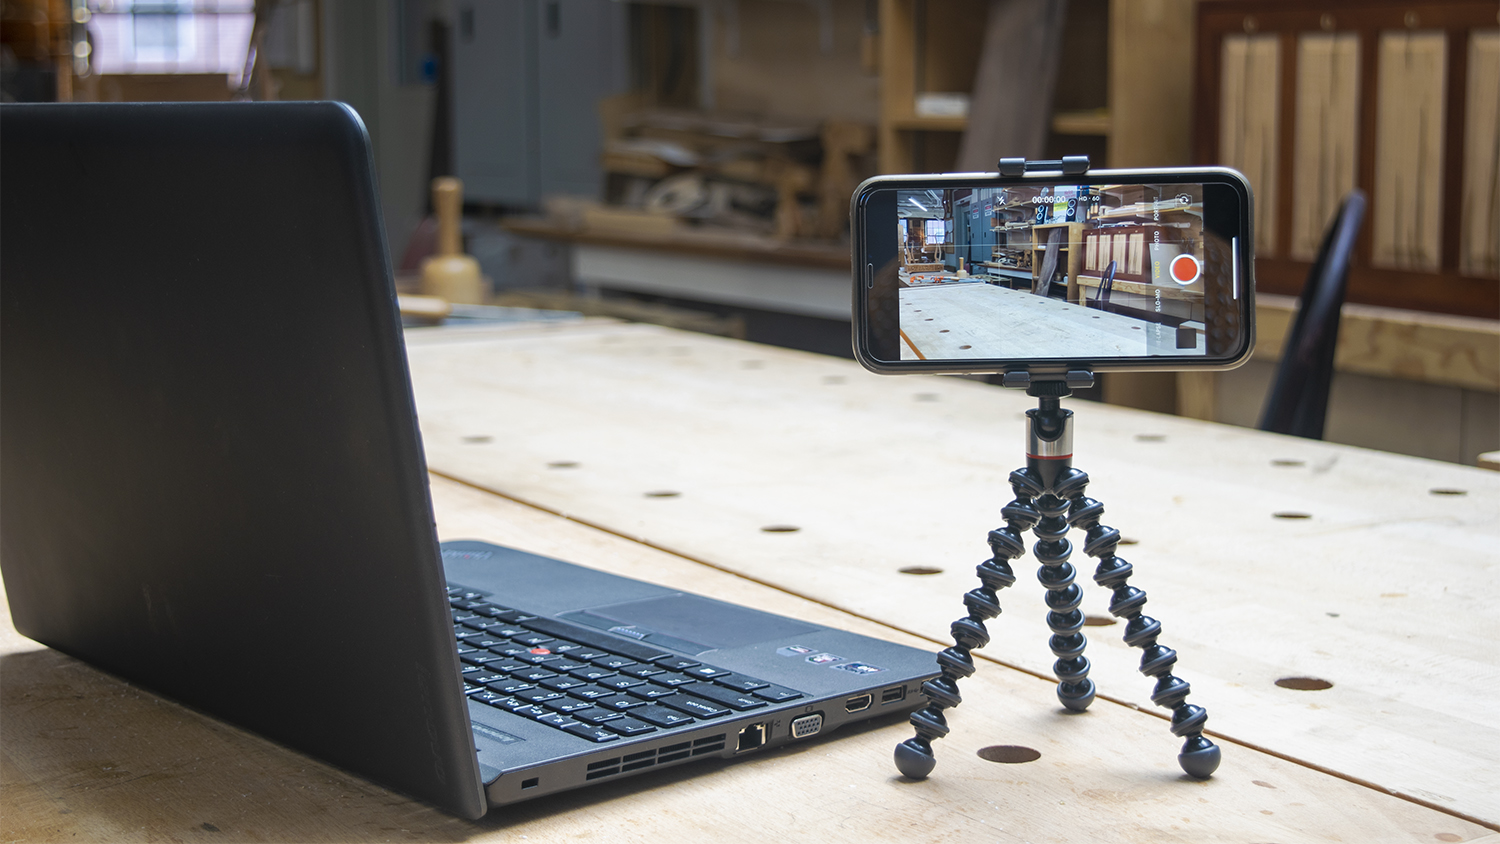
Video (Smartphone, computer, tablet, or camera)
- Your smartphone, computer, or tablet will do the trick, and so you needn’t go out and purchase a camera or anything fancy. (Note: if over five years old, your devices may need an upgrade.)
- For a phone, settings and make sure there are no “auto-off” or sleep features running so the camera doesn’t shut off while filming.
- Record an introduction and a closing. The intro is just your name, and what you’ll be talking about. The closing could simply be a thanks for watching, and a mention of following you on social media. Feel free to tailor as you like.
- Wait a few seconds to begin talking after you hit record and also wait when done talking before you stop recording, to make sure your words don’t get clipped.
- If doing multiple takes or a long demo, etc, start a new clip every few minutes. This will make it easier to upload the smaller files.
- Record in landscape mode (horizontally).
- Keep the camera steady, with the camera at roughly eye level. (Hint: If using a computer, you can place it on books to raise it up. Here’s a great tutorial to check out.
- No need to get fancy with mounting equipment. An affordable tripod or even duct tape will work. Bonus! Check out how our Middle School instructors Colin and Erin set up their project here.
- Record in the highest resolution possible. If using a professional editing tool or experienced videographer: Record in 4K. This will allow the option to create close-ups (CU’s), cover gaps, pauses, stumbles, etc. The ideal settings would be 4K, 24 fps.
- It may be worthwhile to try recording some b-roll CU’s for coverage, as steady as possible.
- For some of the videos, it could be cool to set-up an overhead shot. This can be done with an extra camera (smartphone, tablet, etc) or using a GoPro Hero 7 or GoPro Hero 6. Note that you’d also need to also buy a battery and memory card for any of these GoPros (around $50 total).
Video (Zoom, recorded or live)
- Keep the computer steady, with the camera at roughly eye level. You can place your computer on books to raise it up. Here’s a great tutorial to check out.
- It’s probably worthwhile to have some photos from your guest(s) at the ready, to share on screen and to provide some visual relief throughout the conversation. Before or after, your interview subjects may also want to record some b-roll, which can be added in Post-Production.
- Remember to let you participants know that the session will be recorded, and their chats will be included.
- Ask all guests mute their microphones, and if wanted, to ask questions via the chat window.
- If you’re the host, make sure to introduce yourself and what you’ll be talking about. If applicable, have others introduce themselves. A “thanks for watching” at the close is great too.
- For live conversations, you may want to have some images queued up to share on screen.
- You need a paid account ($15/mo) for high quality recordings. Make these adjustments for the best quality:
- Settings—Meeting: Toggle on “Group HD video” to activate higher quality video for host and participants. (This will use more bandwidth.)
- Settings—Recording: Toggle on Cloud Recording and check on ALL of the options underneath.
- Once the recording is over, you’ll get an email with a link to the video, transcript, and chat log.
- Zoom has a great selection of tutorials so you can quickly get familiar with the software.
Hope this sets you up well for your video project! Make sure to check out great videos from our community coming to you soon, right here on nbss.edu/blog. Thanks, and good luck!